Bringing Your Church to Google Business
A Step-by-Step Guide to Creating a My Business Listing:
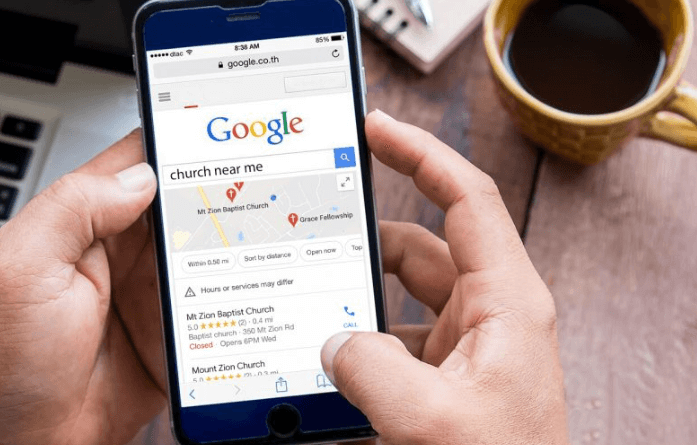
In this digital age, it’s crucial for religious institutions like churches to have a strong online presence. One effective way to achieve this is by creating a Google My Business listing. This listing not only makes your church easily discoverable on Google but also provides essential information to those seeking your services. In this step-by-step guide, we will walk you through the process of bringing your church to Google and setting up a My Business listing.
- Step 1: Sign in or Sign Up
- Step 2: Search for Your Church
- Step 3: Add Basic Information
- Step 4: Verify Your Listing
- Step 5: Complete Your Profile
- Step 6: Manage and EngageStep
- Step 7: Utilize Additional Features
Step 1- Sign in or Sign Up:

To get started, you need to have a Google account. If you don’t already have one, you can sign up for free. Once you’re logged in, visit the Google My Business website (www.google.com/business) to begin the setup process.
Step 2- Search for Your Church:

After signing in, use the search bar to find out if your church is already listed on Google. Google often automatically creates basic listings using publicly available information. If your church is listed, claim the listing to have control over the information displayed. If not, proceed to add your church as a new listing.
Step 3- Add Basic Information:

To create a new listing, click on the “Add your business to Google” prompt. Fill in your church’s name, address, phone number, and category. Make sure the information provided is accurate and up to date. This information will help people find and contact your church easily.
Step 4- Verify Your Listing:

Google requires verification to ensure the authenticity of the information you provide. Depending on your location, you’ll receive a verification code by mail, phone, or email. Follow the provided instructions to verify your listing. Verification enhances your church’s credibility on Google.
Step 5- Complete Your Profile:

Once verified, you can enhance your listing by adding more details. Include a compelling description of your church, information about your services, opening hours, and even photos. High-quality images can give potential visitors a glimpse into your church’s atmosphere.
Step 6- Manage and Engage:
Congratulations, your church is now officially listed on Google! Regularly update your listing with any changes in information, special events, or services. Respond to reviews and engage with visitors’ questions. This interaction can foster a sense of community and encourage more people to visit your church.
Step 7- Utilize Additional Features:

Google My Business offers various features to showcase your church. You can post updates, share events, and even create short posts to keep your audience informed and engaged. Utilize these features to connect with both your existing congregation and potential newcomers